Michael, my company just recently finished an LPR project for a local apartment complex. They wanted license plates capture for both incoming and outgoing traffic. The hope was to get both the front and rear plates. The rear plate was captured as they arrived. The front plate (if any) would be captured upon departure. Lucky for us, they had one way in, which was a single car width lane. The outbound was also a single lane and the only exit. These lanes were separated by a section of grass and landscaping.
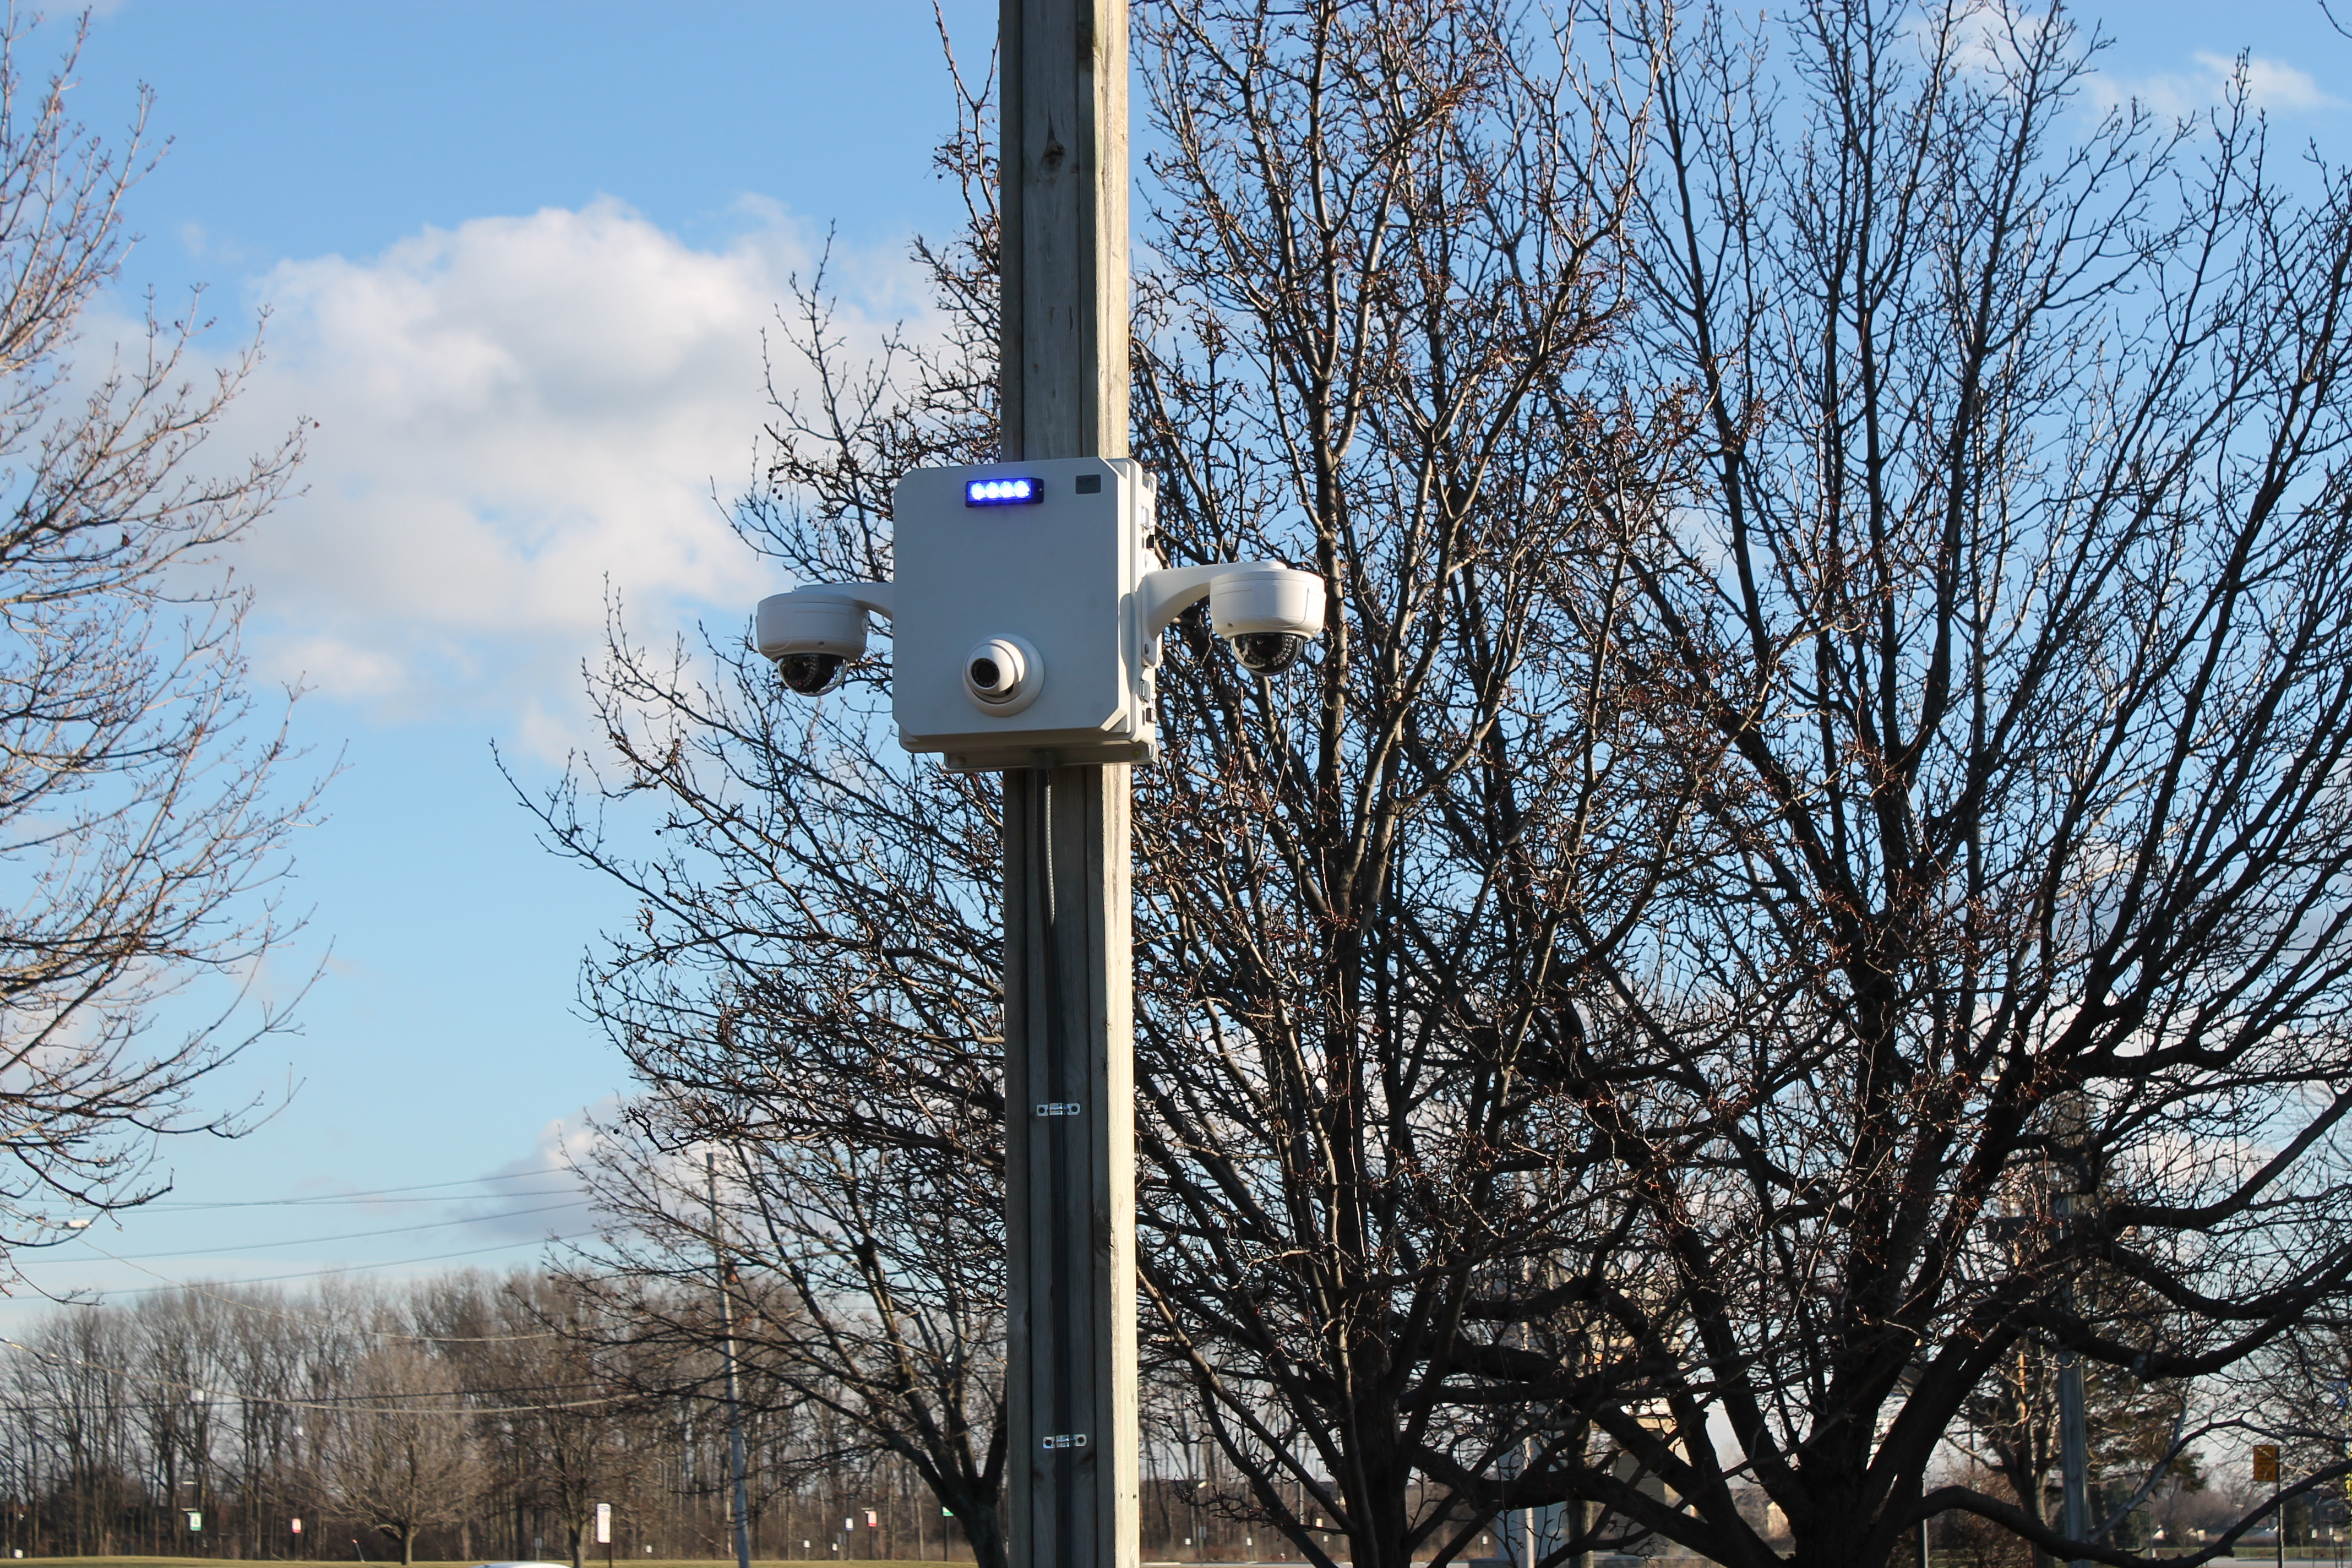
We did quite a bit of testing of different cameras in preparation of this install. What we ended up using was all Nelly Security/Dahua gear. We ended up using a three camera setup for the LPR cams. One 3MP dome for inbound, one 3MP dome for outbound, and a 1.3MP dome for overview. These were all mounted to a 14x10x7 fiberglass box mounted about 8ft off the ground. The pole we attached to was the light pole for the complex. We were able to grab power from the pole itself. We used Ubiquiti radios to transmit the data back to the complex office, which was about 150-200ft away from the pole.
During our testing, we used a RayTec white LED light for illumination, but ended up not needing it for the final install. The light on the pole we mounted provided enough illumination. We had the complex rotate the fixtures about 45 degrees from level towards our monitored area. This gave us about 100 lux of light at the ground where we hoped the cars would pass over.
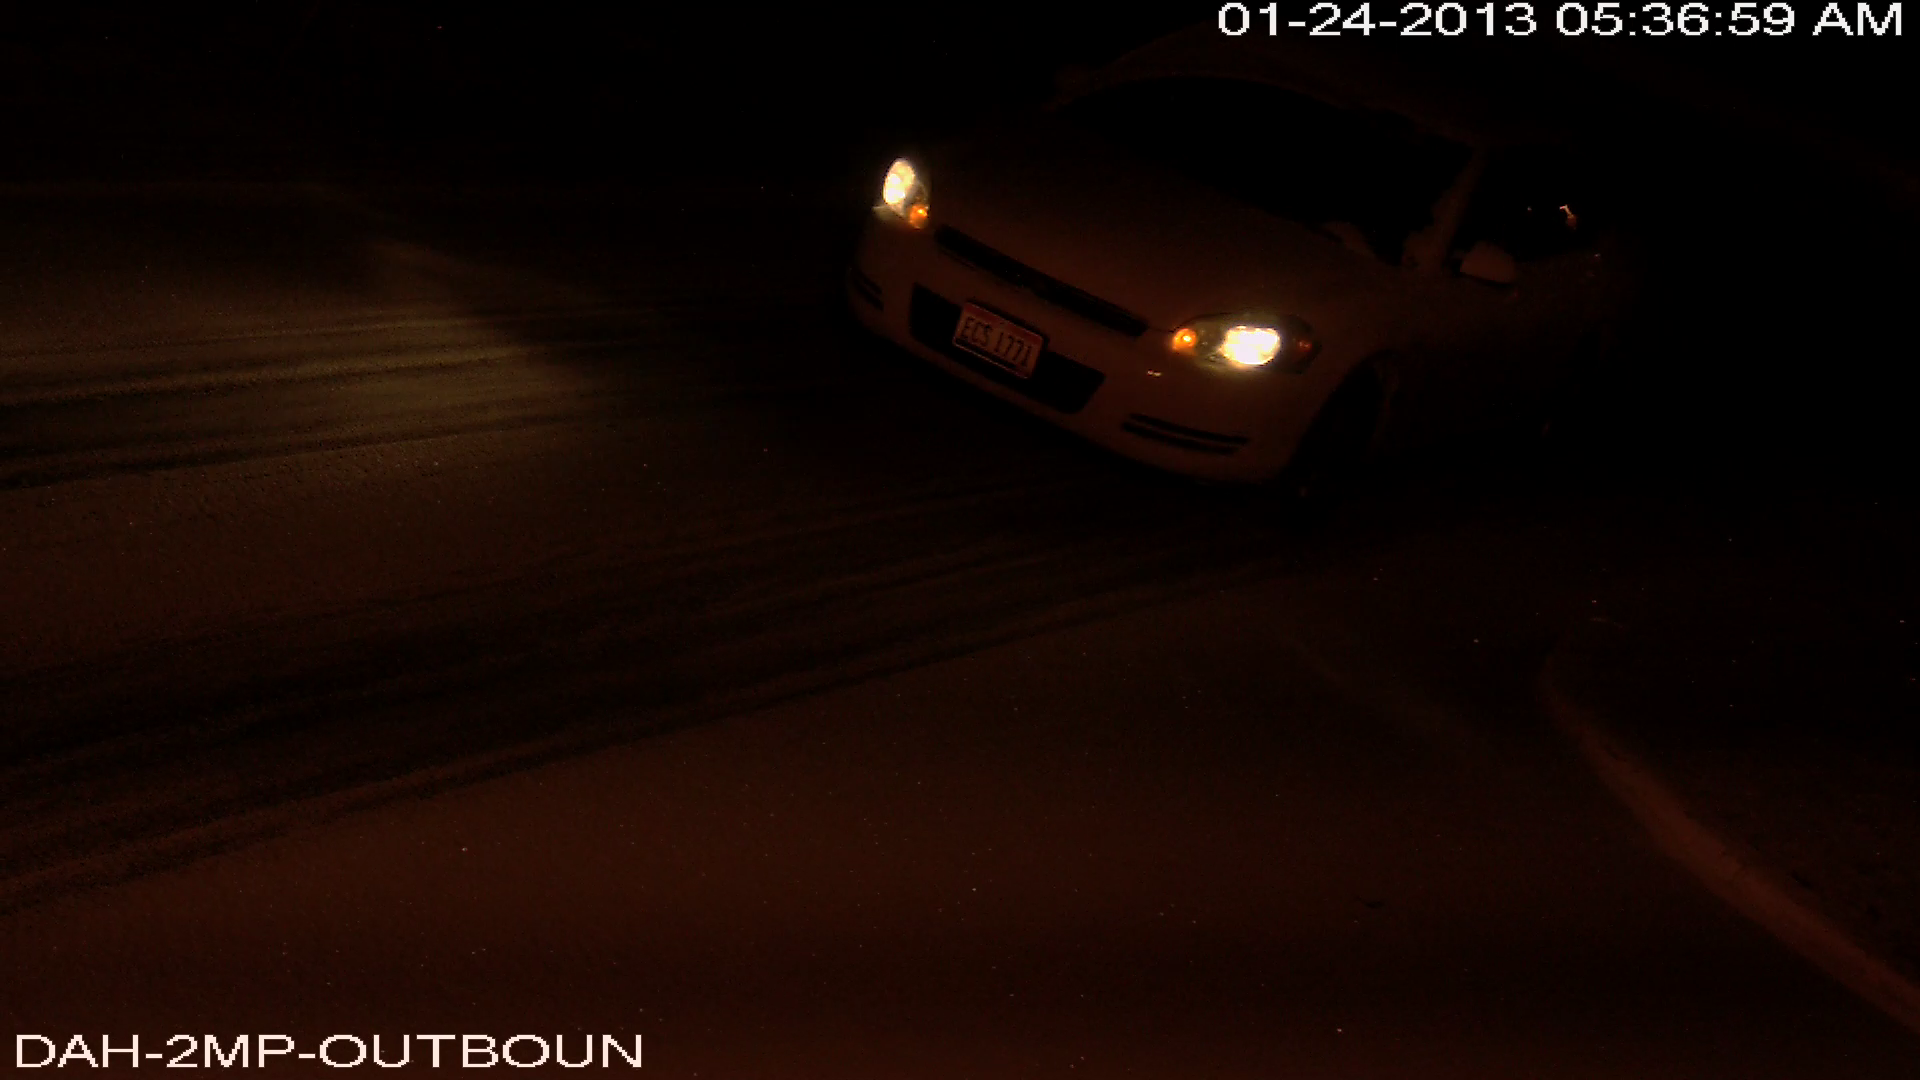
Our cameras were equipped with varifocal lenses that gave us up to 12mm of zoom. We were able to get our FOV to just the width of the lane, which optimized the amount of pixels per foot the cams would give us. The cams were set to 2MP, or 1080P, which was the max our NVR would record. We ended up setting the shutter speed to max out at 8ms and turned the gain all the way down to 1. These cams also offered WDR, and we set it to the Strong mode. We also forced the cams to color mode, even at night. We found that with the color info, we were able to read the plates better. B&W did not offer more clarity, which we assumed going into the project.
The setting above will give you a very dark image at night, which will not give you make, model, color of the vehicles. It does, however, reduce the headlights / taillights effect to almost non existent. In fact, you can almost see the headlight elements themselves at that fast of a shutter. The reason we found we needed that fast of a shutter speed was due to two factors, the headlights and motion blur. With the 7ms setting, we could read plates up to 45MPH with no sign of blur. That was the limit of how fast we could drive in the test area we worked in. In the installed environment, we couldn't imagine a car getting about 20MPH due to a T in the road with stop signs and speed bumps.
Due to the fact that the complex also needed make, model, and color info of the vehicles coming and going, we added the third overview cam. This 1.3MP cam was also set to color mode, for obvious reasons, but we let the shutter and gain settings remain in auto mode. This camera is able to give us very clear images in color all night long, without much blur at all.
In the end, the setup is working well. We don't have any LPR software running yet to index the plates, but that might be a project the complex may decide they want to invest in later.